consent
Steps to Add AOK Consent
Important Note : You need to log in as AOK Admin. After a successful login, to add AOK Consent files, we need to follow the steps given.
-
Select Inhalt (Content) -> Inhalt hinzufügen (Add Content) -> Consent management

-
Add appropriate page titel (Titel for CMS page reference )
-
Add Consent Titel (It will display this title in API Response)
-
Add Consent Settings Title (This title will be shown in Settings screen)
-
Select Plugins (If it is generic then select 'Navida Base Plugin Creation')
-
Consent Version is default 1.0 & Content Version 1.0, when there is small update content version will update by 0.1. Important Note : If there is major update in the Consent update consent version to 1.1 & so on.
-
Upload consent Icon Click on 'Dateibrowser öffnen (File Browser)' it will open IMCE file browser, upload image and click on 'Auswahlen (Select)' it will add consent icon.

-
Add Consent Description, here you can add formatted text with HTML tags allowed.
-
Add Consent Delete Message, here you can add formatted text with HTML tags allowed.

####Add Compliances
We can add multiple compliances, there will be default form opened to add compliance content.
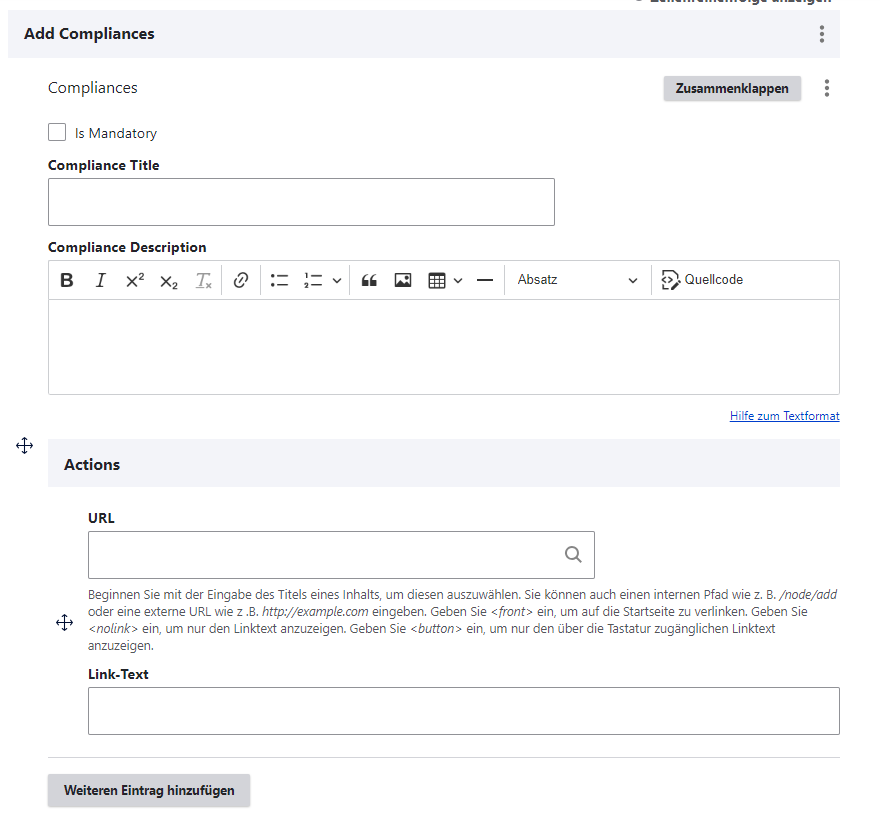
Compliance Content
- Is Mandatory - Check if this compliance is mandatory for app user
- Add Compliance Title
- Add Compliance Description (This field accepts the formatted text with HTML tags)
- Actions Add 'URL' & 'Link-Text' for the clickables for compliance page. To add multiple actions click on Weiteren Eintrag hinzufugen (Add another item) it will create new actions fields.
- To add multiple compliances click on 'Compliances hinzufugen (Add Compliances)' button at bottom, it will create new compliances form.
- Click on 'Speichern(Save)' button.
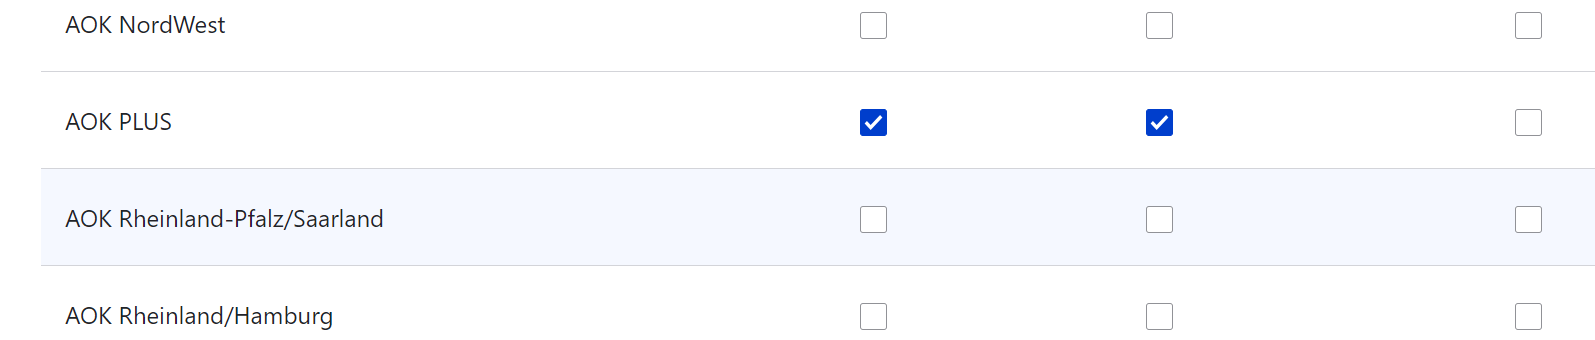
- We need to provide grant for the AOK, after published click on Grants tab.
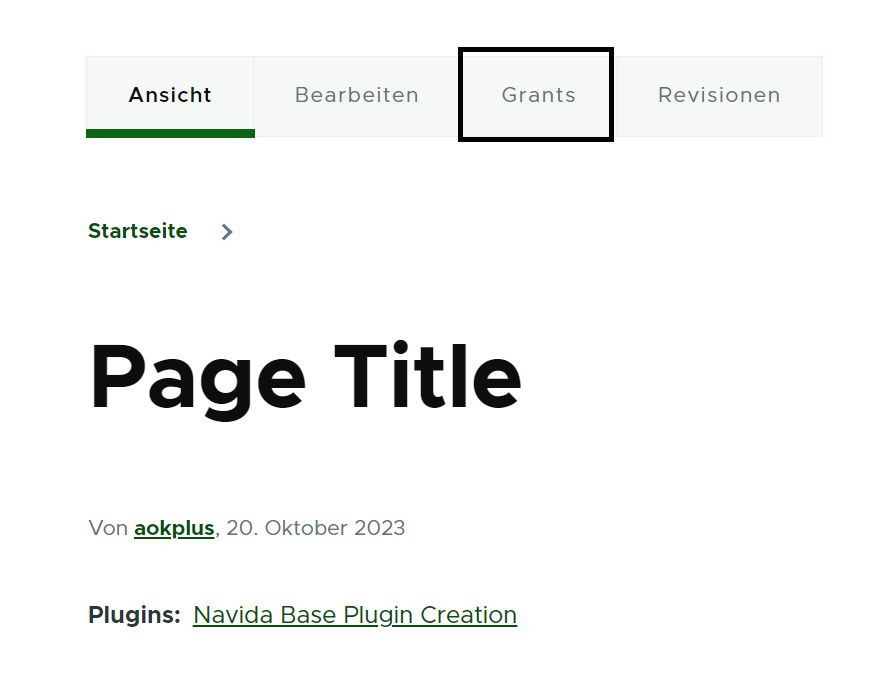
- Give the permission for the Role (Ansicht, Bearbeiten) permission, select the check box and click on 'Save'
Edit Consent Pages
To edit consent pages follow given steps,
- Click on 'Inhalt(content)'.
- Choose the consent page to edit (check if Inhaltstype is 'Consent management') -> Click on 'Bearbeiten(Edit)' button at right side respective at Titel column.
- Edit the page, after editing please make sure 'Vröffentlicht(published)' is chcked.
- Click on 'Speichern(Save)' button.
Important Note : After making any changes or updates to consents, it is crucial to update the corresponding consent and content versions in the plugin configuration.
It is recommended to use version numbers that do not include zeros after the decimal point.For example, prefer using 1.1 instead of 1.0.

Consent Revisions
To find the consent revisions follow the given steps,
- Click on 'Inhalt(content)'.
- Choose the consent page to edit (check if Inhaltstype is 'Consent management') -> Click on 'Bearbeiten(Edit)' button at right side respective at Titel column.
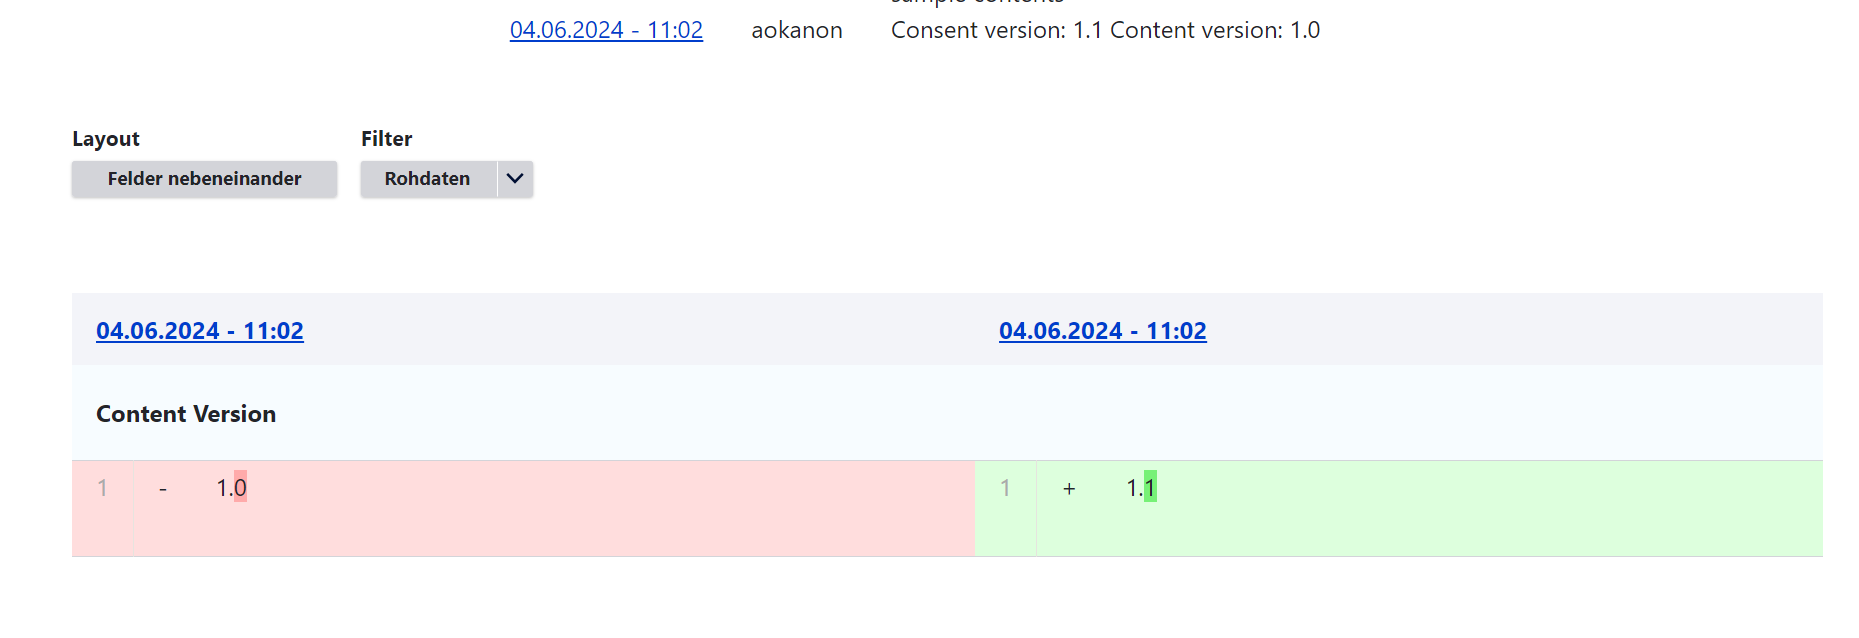
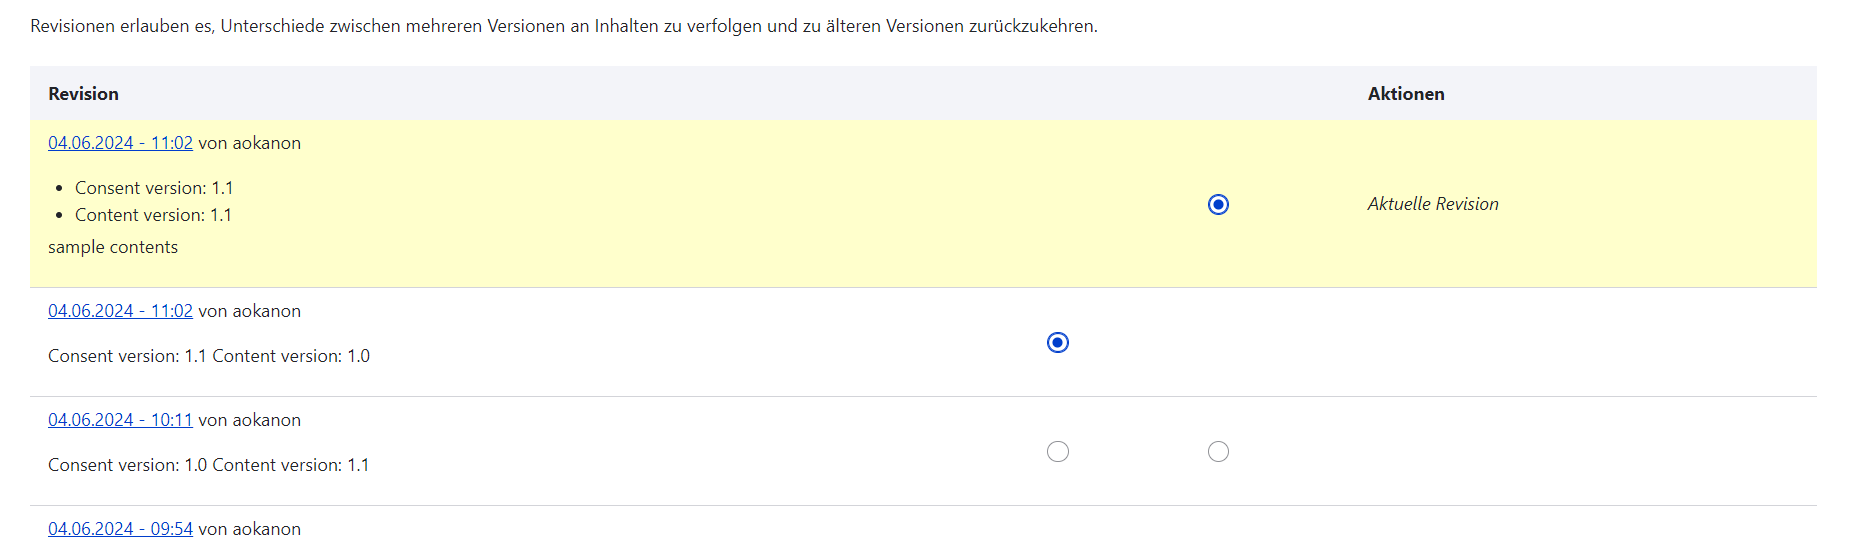
- Click on 'Revisionen(Revision)' tab. It will show all revisions for the consent.
- We can compair the 2 revisions. Select the revisions using radio buttons and click on 'Ausgewählte Revisionen vergleichen(Compare Selected Revisions)' it will give the comparison page 2 revisions side by side. Changes are green colored and current one is red.
- We can revert the consent to the older version Click on 'Zurücksetzen(revert)' it will revert the consent to the selected revision content.
Important Notes :
- For Consent version field Default version is 1.0. If there are major updates to the consent, update the Consent Version. Maximum length of this field is 5 (including '.') Ex. 1.1 or 1.2 or 2.0 ...
- 'Content Version' field is non editable. It will be updated automatically based on the value of 'Consent version' field. Ex. When there is major update in consent, Update 'Consent version' from 1.0 to 1.1. Now, the Content version will be updated to 1.0 automatically.
- Upload Images using imce file browser. If we upload using file upload it will create system folders with default names also it will crop & resize images.
- Please refer the ImceFilesServer documentation to know about how to upload images.